Navigating the System
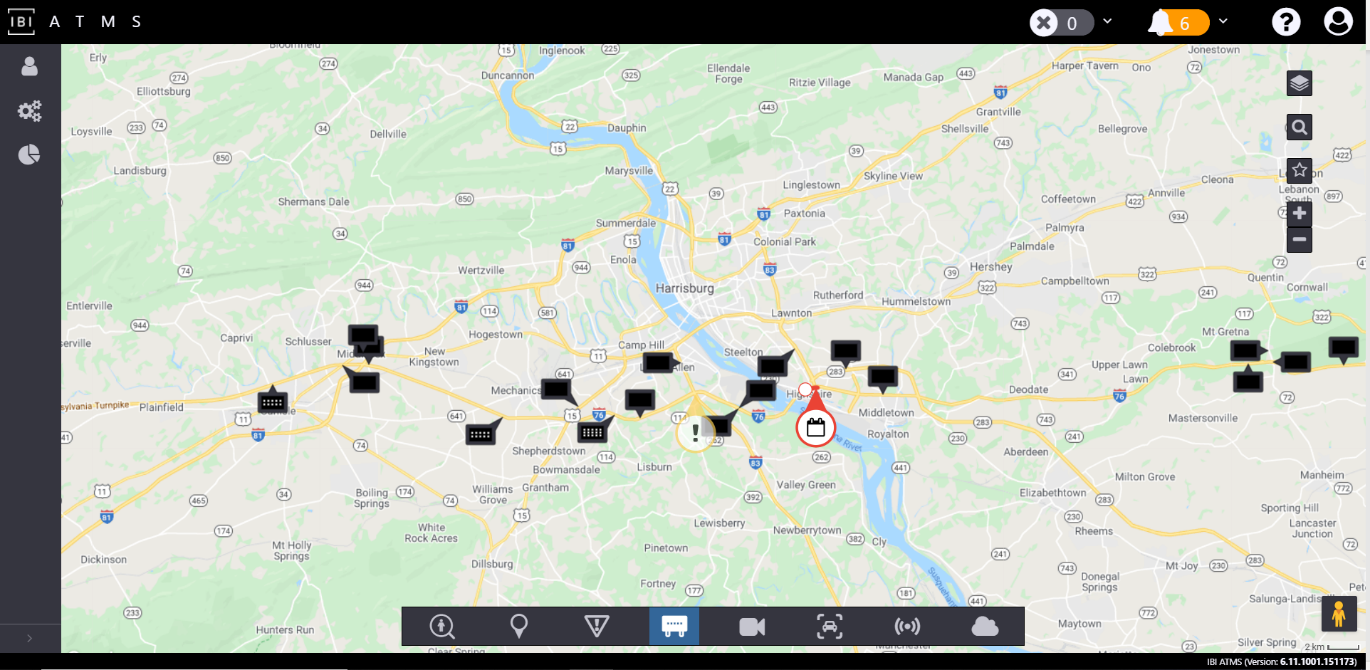
The primary screen of the ATMS User Interface (UI) is a map-based view that provides access to all functionality required for traffic management operations. You can access other screens using the Navigation menu on the left side of the screen.
The ATMS also provides notifications when something occurs that requires your attention.
Using the Navigation Menu
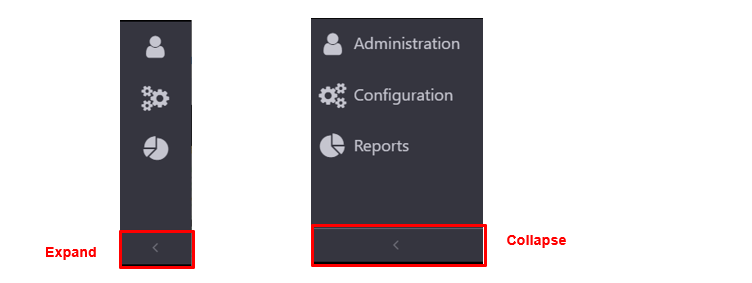
The navigation menu is located on the left side of the screen. You can expand and collapse the menu using the arrow at the bottom of the bar.
The expanded version shows both the name of the menu item and an icon representing the features you can access from it. The collapsed version shows only the icon.
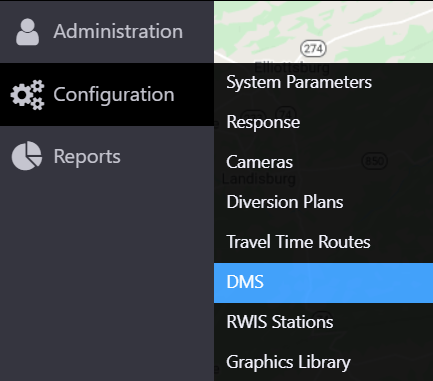
You can expand the menu by hovering over an item. The item that will be selected on mouse click is highlighted in blue.
Notifications
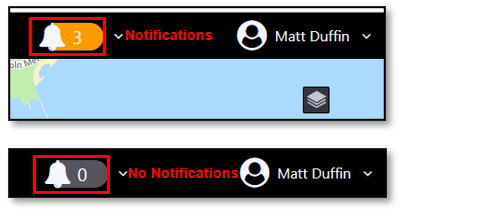
The ATMS indicates if you have unhandled notifications with the color and the number next to the event and device notification icons at the top right of the screen. Event notifications indicate that something may require your attention, such as potential new traffic incidents or the start or end time of scheduled road closures. Device notifications indicate device issues, such as communication loss or error messages from devices. Device notifications may or may not be visible, depending on the permissions assigned to your user group.
Action Notifications
You can view your notifications by clicking on the indicator to expand the event notifications panel. Your event notifications are sorted by priority, showing highest priority on top. You can also view recently Completed notifications at the bottom of the panel, along with who completed the action that cleared the notification, and when they completed it.
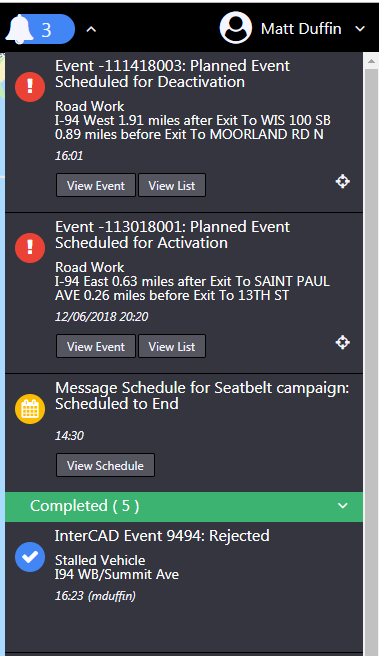
Event notifications are completed when the underlying issue that required is cleared, either through action taken in the system, or changing road conditions. Some examples of this are:
- You or another user activated or deactivated a planned event
- You or another user activated or deactivated a scheduled DMS or HAR message
- A potential incident reported by an external system is no longer in the data feed from that system
- Reported weather conditions have cleared
Priority
Priority of notification in the event notification section is indicated by the icon color. Icon color and event notification priority are as follows.
| ICON | DESCRIPTION |
|---|---|
| High Priority: An event notification with red icon has high priority. Typically, this includes new external events and unowned events. | |
| Medium Priority: An event notification with yellow icon has medium priority. Typically, this includes response plan notifications and scheduled event reminders | |
| Low Priority or Completed Task: An event notification with blue icon has low priority or is a completed task. |
Actions
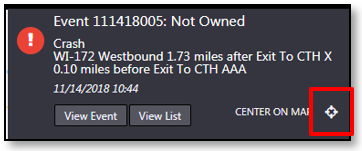
Notifications typically cannot be acknowledged or dismissed directly. Instead, each notification provides buttons that you can use to open the screens used to complete whatever action is required. If the notification is related to an event, or device, you can center the map on that event or device using the target icon on the right side of the notification.
Device Errors
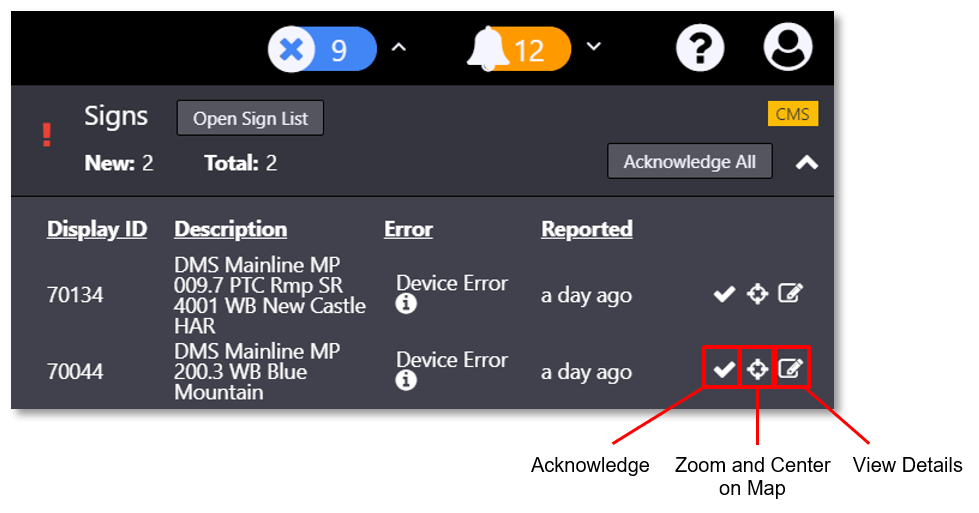
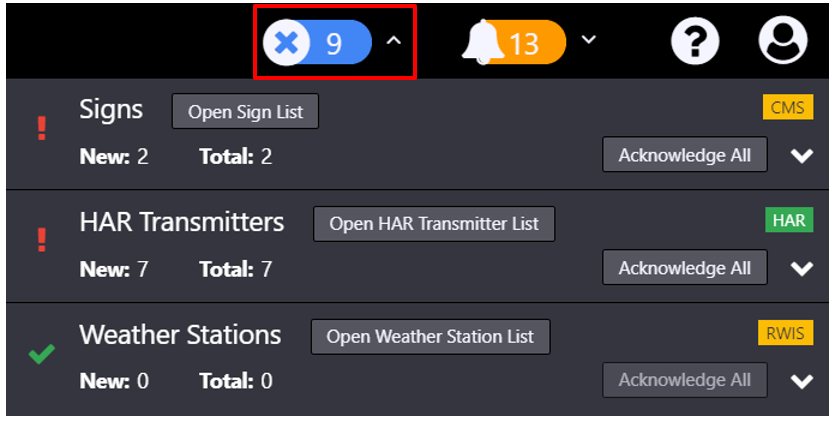
You can view a list of all devices currently detected to be in an error state by clicking on the indicator to expand the Device Errors panel. Devices are grouped by device type (Signs, Cameras, Signals, Weather Stations etc.). Each device entry in the panel includes the device name or id, description, an indication of the type of error (communication failure or other device error) and the time the error was first reported. Users can hover over the info icon next to the error type to view additional details about the reported error.
If there are no device errors in a device type, there will be a green check to the left of the device type name. Otherwise, there will be a red exclamation point. Each device type lists the total amount of errors and how many new errors there are. A device error is no longer new once it has been acknowledged in the system.
Actions
Each device error has three actions in the notification panel. You can acknowledge the device error, view it on the map, or view the device details in a pop-up window.
The check-box icon (left-most) acknowledges the device error. Acknowledging the device error indicates that someone has seen the error and updates the count of new device errors.
The target icon (center), zooms and centers the map on the device.
The view/edit icon opens the device's properties view.
